
How Much Does Attic Insulation Cost in Florida? (2025 Homeowner Guide)
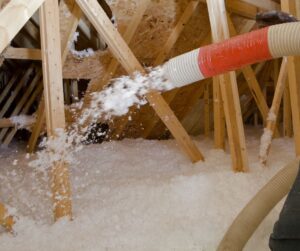
Proper attic insulation is one of the most effective ways to improve home comfort and reduce energy bills in South Florida. With year-round heat and humidity, homeowners in Boca Raton, Delray Beach, Highland Beach, and surrounding areas often notice that their AC system works overtime to maintain indoor temperatures. The majority of this energy loss happens through poorly insulated attics.
In this blog, we answer three of the most common questions local homeowners ask:
-
How much does attic insulation cost in Florida?
-
What’s the best insulation type for hot, humid climates like South Florida?
-
Should old insulation be removed before new is installed?
If you’re planning an attic insulation upgrade this year, this guide will help you make an informed decision.
❓ Question 1: How Much Does It Cost to Insulate an Attic in Florida?
Attic insulation cost in Florida typically ranges between $1.50 and $3.00 per square foot, depending on attic accessibility, insulation type, and whether removal is needed.
👉 Cost Breakdown
| Project Type | Estimated Cost per Sq Ft | Notes |
|---|---|---|
| Blown-in insulation (most common) | $1.50–$2.50 | Best for existing homes |
| Fiberglass batt insulation | $2.00–$3.00 | Better for open attic areas |
| Spray foam insulation | $4.00–$7.00 | Ideal for new construction, premium solution |
| Insulation removal | $1.00–$2.00 | Add to cost if replacement required |
For a typical 1,500 sq ft attic, most Boca Raton homeowners spend between $2,250 and $4,000 for blown-in attic insulation upgrades. If old insulation removal is required, expect the total to be on the higher end of the range.
While spray foam insulation has a higher upfront cost, it may be more suitable for new construction or homes undergoing major renovation. For most existing residential properties in South Florida, blown-in fiberglass insulation delivers the best value-to-performance ratio.
❓ Question 2: What Is the Best Attic Insulation Type for South Florida?
South Florida’s heat, humidity, and high energy usage make blown-in fiberglass insulation the top choice for most existing homes. It delivers excellent coverage, fits around attic obstacles, and can be installed quickly with minimal disruption.
📍 Best Insulation Options for South Florida Homes
| Insulation Type | Ideal For | Advantages |
|---|---|---|
| Blown-In Fiberglass | Existing homes | Fast to install, great coverage, energy efficient |
| Cellulose | Older homes | Eco-friendly but may retain moisture |
| Spray Foam | New construction or specialty spaces | Highest R-value, air sealing benefits |
| Fiberglass batts | Walkable attics | Lower cost but limited coverage |
To meet energy recommendations for South Florida (Climate Zone 1), homes should have between R-30 and R-38 attic insulation. That translates to approximately:
-
9.5 inches of insulation for R-30
-
12 inches of insulation for R-38
Installing to recommended thickness levels helps improve AC efficiency and stabilize indoor temperatures during hot afternoons.
At this performance range, attic temperatures can be reduced by 20–40 degrees, helping HVAC systems run less frequently, which translates into lower energy bills.
❓ Question 3: Should You Remove Old Attic Insulation Before Adding New?
Not always — but in many cases, yes.
If the existing insulation is dry, clean, and not compressed, additional insulation can be installed directly over it using blown-in materials. However, insulation should be removed before upgrading if it is:
-
Damp or moldy
-
Pest-contaminated
-
Discolored or degraded
-
Visibly deteriorated (flattened, compacted)
-
Installed before modern energy standards
🚨 If there are signs of moisture or rodent activity, replacement is strongly recommended.
A professional insulation contractor can perform an inspection and determine whether topping up the insulation is sufficient or full replacement is needed. In many cases, proper removal and replacement results in better long-term performance and improved indoor air quality.
🌴 Why This Matters in Boca Raton
Energy usage is highest during late afternoon hours in South Florida. When attic temperatures exceed 120°F, air conditioning units must work harder to cool the home. Proper insulation helps prevent that heat transfer.
-
Homes upgraded from standard insulation to R-38 can reduce cooling bills by 10–25%
-
Improved insulation helps extend HVAC lifespan
-
Reduced attic humidity can protect structural wood elements
-
Increasing energy performance may help meet local real estate and mortgage requirements
🏆 Why Homeowners Choose Professional Installation
While some stores offer rental insulation blowers, most homeowners prefer professional installation because it ensures:
✔ Correct R-value and thickness
✔ Even distribution across the attic
✔ Code compliance (R-30 to R-38)
✔ Identification of ventilation or moisture issues
✔ Optional removal of outdated insulation
Professional attic insulation also provides documentation, which can be helpful when selling the home or applying for energy rebate programs.
👇 Final Thoughts
Upgrading attic insulation is one of the most cost-effective home improvements available to South Florida residents. The best insulation for existing homes is typically blown-in fiberglass, and while cost varies by home size and attic condition, the long-term energy savings often make the investment worthwhile.
When old insulation is damaged or deteriorated, removal followed by new installation delivers better performance and air quality benefits.
📞 Need attic insulation done right?
Superior Spray Foam Insulation, located in Boca Raton, FL, is a Leader in Attic Insulation Installation in Boca Raton, FL, specializing in blown-in insulation upgrades, attic insulation replacement, and high-performance energy solutions tailored to South Florida’s climate.
While best known for spray foam insulation, the company also provides expert attic insulation for existing homes throughout Boca Raton, Delray Beach, Highland Beach, Deerfield Beach, and the surrounding area.
For a free attic insulation evaluation and estimate, visit SprayFoamInsulationBocaRaton.com or contact the team today.
Preparing Your Pool for Summer: A Step-by-Step Checklist

The summer season is approaching, and it’s time to get your swimming pool ready for sunny days of relaxation, family fun, and pool parties. Preparing your pool involves more than just removing the cover; a detailed checklist ensures that your pool is clean, safe, and inviting for the entire season. This guide outlines the essential steps to help you effectively prepare your pool for the summer, from cleaning and inspecting equipment to balancing pool chemicals and ensuring safety.
Clean and Clear the Pool Area
Start by clearing the pool area of any debris accumulated over the winter. Leaves, twigs, and dirt can easily find their way into your pool, making this a key step in the preparation process. Inspect the pool deck for any cracks or damage. Addressing these early prevents further issues during the busy season. Organize pool equipment like skimmers, brushes, and vacuums to ensure everything is in working condition. A clean and organized pool area sets the stage for hassle-free maintenance.
Inspect and Prepare Pool Equipment
Examine the pool pump and ensure you have a clean filter. These components are essential for keeping your pool water clean and safe. Look for any signs of wear or malfunction. If you have a pool heater, test it to ensure it’s functioning correctly for those cooler summer nights. Inspect the plumbing and connections for leaks or weak spots that could cause issues later. A well-maintained system helps keep your pool running smoothly throughout the summer.
Test and Balance the Water Chemistry
Before anyone dives in, test the chemical levels in your pool using a reliable test kit. Check the pH, alkalinity, and chlorine levels, adjusting them as needed:
- pH: 7.4 to 7.6
- Alkalinity: 80 to 120 ppm
- Chlorine: 1 to 3 ppm
Properly balanced water keeps your pool looking clear and ensures it’s safe for swimmers. Maintaining calcium hardness levels helps prevent damage to the pool’s surfaces and equipment.
Shock and Clean the Pool
Pool shock is a powerful way to eliminate bacteria and contaminants that may have built up during the off-season. After shocking the water, scrub the pool walls and floor with a pool brush to remove algae or grime. Vacuum the pool thoroughly to collect dirt and debris that might have settled. For inground pools, consider using an automatic pool cleaner for added convenience.
Check Safety Features
Safety is an important aspect of preparing your pool for summer. Inspect fencing, gates, and any barriers surrounding the pool to ensure they meet safety standards. Examine your pool cover for wear and tear before storing it away. Double-check safety equipment like life rings, ropes, and first aid kits to confirm they’re in good condition and easily accessible.
Refill and Adjust the Water Level
Your pool’s water level may have dropped over the winter. To remedy this, fill your pool to the midpoint of the skimmer opening. Once filled, test the water again to ensure the chemical balance remains intact. Consistent water levels prevent damage to the pump and ensure efficient filtration.
Final Touches for a Summer-Ready Pool
Thoroughly clean pool accessories like ladders, diving boards, and slides. Arrange outdoor furniture like lounge chairs and tables to create an inviting space for pool parties or quiet relaxation. Add decorative elements like string lights or poolside plants to enhance the atmosphere.
Conclusion
Getting your pool ready for summer doesn’t have to be overwhelming. This comprehensive checklist helps ensure your pool is clean, safe, and prepared for summer-long enjoyment. Regular pool maintenance throughout the season will keep your pool looking great and operating smoothly, allowing you to focus on making the most of your time in the water. Don’t be afraid to hire a professional pool company. There are many knowledgeable pool maintenance and pool repair companies out there. Just be sure to find one with a good reputation in your area.
Is Artificial Turf Safe for My Family and Pets?

Let’s face it: between sticky fingers, muddy paw prints, and the never-ending cycle of “Mom, I’m bored!” and “Spot just rolled in something,” your backyard is probably less of a relaxing oasis and more of a war zone. Enter artificial turf—the ultimate parenting hack disguised as a lawn. But is it safe for your little ones (human and furry)? Let’s dig in.
What Is Artificial Turf, Anyway?
Artificial turf is a synthetic grass alternative made from materials like polyethylene and nylon, designed to mimic the look and feel of a lush green lawn. It’s low-maintenance, durable, and—you guessed it—mud-free. No more panicked sprints with the dog after he’s had his eye on the rain-soaked flower bed.
Safety for Kids: What Research Says
First, let’s talk about the kids. Artificial turf is designed with safety in mind, featuring soft surfaces that cushion trips and falls. Many types also have padding underneath, making it a better landing spot for those trampoline stunts that you definitely didn’t approve of.
But what about chemical exposure? Research into artificial turf and its components—like the infill made from recycled rubber (often referred to as “crumb rubber”)—has been ongoing for years. The Environmental Protection Agency (EPA), the Centers for Disease Control and Prevention (CDC), and several state agencies have conducted studies to assess potential risks.
- Crumb Rubber Studies: Most research, including a 2019 EPA report, found that the chemical exposure from crumb rubber is extremely low and unlikely to pose health risks. The study examined levels of heavy metals, volatile organic compounds (VOCs), and other substances, concluding that exposure is below levels of concern for both children and pets.
- Ongoing Research: A 2020 multi-agency federal research project (including the EPA and CDC) expanded the data, reinforcing that artificial turf surfaces are generally safe. Still, advancements in turf manufacturing have led to more eco-friendly and non-toxic materials for even greater peace of mind.
For concerned parents, many turf products now come with certifications like the GREENGUARD Gold standard, ensuring they meet strict safety guidelines for indoor and outdoor use.
Safety for Pets
Now, let’s address your four-legged tornado. Artificial turf is pet-friendly, meaning it’s durable enough to handle zoomies and soft enough for naps. (Why does the dog nap more than you do?)
The turf’s drainage system also means Spot’s “business” won’t linger, and it’s easy to clean with a quick rinse. Plus, because artificial grass doesn’t harbor ticks or fleas, your pup gets pest-free playtime—and you get fewer vet bills.
But What About Heat?
It’s true that artificial turf can get warmer than natural grass on hot days, but there are easy fixes:
- Cool It Down: A quick spray with the hose can lower the temperature. Bonus: kids think it’s a water park.
- Shade Solutions: Umbrellas, trees, or pergolas can keep the area cool for everyone. (And let’s be real—you deserve a shady spot to sip iced coffee in peace.)
Benefits for Moms (and Dads, Too!)
Let’s be honest—this section is really about you. Artificial turf means no mowing, no watering, and no patching up the brown spots where the kids and the dog have declared battle. It’s like gaining hours of your life back. Imagine: instead of yard work, you could be sipping margaritas while pretending not to watch reality TV.
The Verdict
Artificial turf is a win-win for families. Backed by research and evolving manufacturing standards, it’s safe for kids and pets, easy on the eyes, and even easier on your schedule. Sure, it might not smell like freshly cut grass, but let’s be real—did you really love that smell, or was it just the sound of lawn chores calling your name? Need a reputable artificial turf company in Scottsdale? Give Premier Artificial Turf a call. 480-718-7232
So go ahead—embrace the artificial turf life. Your kids, your pets, and your overwhelmed mom brain will thank you. Now, who’s up for margaritas on the patio? (After bedtime, of course.)
Transform Your Yard with a New Concrete Patio

A concrete patio is a versatile and durable addition to any yard, providing a functional and attractive outdoor space for relaxation, dining, or entertaining. With a wide array of styles and installation techniques available, a concrete patio can suit almost any aesthetic preference and budget. However, understanding the process and choosing the right time of year for installation can make a significant difference in the quality and longevity of your investment.
Here’s everything you need to know about installing a concrete patio, including style options, techniques, and the best seasons for concrete flatwork.
Why Choose Concrete for Your Patio?
Concrete is a popular choice for patios because of its durability, affordability, and design flexibility. It can mimic the look of more expensive materials like stone or brick while offering the strength to withstand heavy use and weather conditions. Plus, with proper installation and maintenance, a concrete patio can last for decades.
Styles of Concrete Patios
Concrete patios are incredibly versatile, and homeowners can choose from several styles to match their preferences:
- Stamped Concrete
- Stamped concrete is designed to replicate the look of natural stone, brick, tile, or wood.
- Patterns are created using specialized stamps pressed into the wet concrete.
- It’s an excellent choice for those seeking a high-end appearance without the price tag.
- Exposed Aggregate
- This style involves removing the top layer of cement paste to reveal the decorative aggregate beneath.
- The result is a textured, non-slip surface that’s both stylish and practical.
- Perfect for modern or rustic outdoor settings.
- Stained Concrete
- Staining adds color and character to plain concrete, creating a rich, variegated finish.
- Acid-based stains produce a natural stone-like effect, while water-based stains offer a broader range of colors.
- Polished Concrete
- Polished concrete offers a sleek, smooth surface with a glossy finish.
- This style is best suited for covered patios or indoor-outdoor spaces.
- Broom Finish
- A simple and affordable option, a broom finish adds subtle texture for slip resistance.
- This style works well for homeowners prioritizing functionality and affordability.
Installation Techniques for Concrete Patios
The installation of a concrete patio requires expertise to ensure a durable and visually appealing result. Here are some common techniques used:
- Pouring and Leveling
- After preparing the site by excavating and creating a stable base, contractors pour and level the concrete. Proper leveling ensures an even surface and prevents drainage issues.
- Reinforcement
- Adding steel rebar or wire mesh helps strengthen the concrete and minimize cracking.
- Finishing
- Techniques like stamping, staining, or applying a broom finish are completed before the concrete fully sets.
- Careful finishing ensures a professional appearance and enhances durability.
- Sealing
- A sealant is applied after the concrete cures to protect it from moisture, stains, and wear.
The Best Time of Year for Concrete Flatwork
Timing plays a crucial role in the success of concrete projects like patios and driveways. Concrete work is sensitive to temperature and humidity, so choosing the right season can prevent issues like cracking or improper curing.
- Spring
- Spring is an ideal time for concrete work in many regions because temperatures are moderate and rainfall is predictable.
- This season allows contractors to work without the risk of extreme heat or freezing temperatures.
- Summer
- Early summer is another good option, as long as extreme heat is avoided.
- Hot weather can cause concrete to dry too quickly, leading to cracks, but this can be mitigated with proper curing techniques.
- Fall
- Fall is also suitable, particularly in areas with mild weather.
- Cool temperatures ensure steady curing, but it’s important to complete projects before the first frost.
- Winter
- Winter is typically not recommended for concrete work in colder climates due to the risk of freezing during curing.
- However, in warmer regions, winter projects can be feasible with proper precautions.
Benefits of Hiring Professionals
While DIY concrete projects might seem appealing, installing a patio requires expertise to avoid common pitfalls like poor drainage or premature cracking. Professional concrete contractors bring the skills, tools, and materials needed for a flawless installation.
Conclusion
A concrete patio is a fantastic way to enhance your outdoor space, offering durability, style, and versatility. Whether you prefer the timeless appeal of stamped concrete, the modern elegance of polished finishes, or the natural look of exposed aggregate, there’s a style to match every taste.
By choosing the right time of year and working with experienced professionals, you’ll ensure your patio is not only beautiful but also built to last. So, start planning your concrete patio project today and enjoy a stunning outdoor retreat for years to come!
When Your Trees Need a Trim: Signs to Watch For and the Benefits of a Proper Prune (with a Southern Twist)

If you’re the proud owner of trees, you know they’re like that one friend who insists they’re low-maintenance. But even the most “independent” tree sometimes needs a little TLC. Especially in the South, where the climate can encourage trees to grow fast and full, a regular trim is essential. So, how do you know when your trees are due for a little pruning? Let’s explore the signs that it’s time for a trim and why your trees (and you!) will thank you for it.
Signs Your Tree is Ready for a Trim
- Branching Out Over Power Lines
Trees in the South grow quickly, thanks to the region’s warm, humid climate. While it’s great for shade, it also means branches can stretch faster than you think. If your tree has branches mingling with nearby power lines, it’s a safety hazard waiting to happen. One gust of wind, and those branches could cause power outages or sparks. Let the pros handle this one, though—working near power lines is dangerous work best left to trained professionals. - It’s Looking a Bit Like a Southern Belle’s Dress – Layered and Full
Southern trees, particularly live oaks and magnolias, are known for their full, sweeping canopies. But when branches start layering on top of each other too thickly, the dense foliage can block sunlight and hinder air circulation. Think of it as giving your tree a haircut to let it breathe—trimming the crown allows sunlight to reach more parts of the tree, keeping it healthy and vibrant. - Deadwood is Showing Up
Every tree has its limits, and older branches eventually start to wither. Deadwood may be subtle at first, but these brittle branches are one of the clearest signs that your tree could use some attention. Dead branches not only weigh down the tree but also pose a risk of falling—especially during summer thunderstorms common in the South. Removing deadwood keeps your tree healthier and reduces potential hazards. - Branches Are Drooping and Leaning
Whether it’s from heavy rainfall or years of natural growth, sometimes trees develop a lean. A slight tilt can be natural, but if it’s starting to look like it might do the cha-cha down the road, it’s time to trim. Pruning can help redistribute the weight and make the tree less likely to topple during strong winds or storms. - It’s Been More than a Few Years Since the Last Trim
Even if your tree looks fine, regular trimming every few years is ideal for keeping it in top shape. In the South, where trees like crape myrtles and loblolly pines grow vigorously, keeping up with a regular trim schedule ensures they stay strong and healthy while looking their best.
Benefits of Trimming Trees in the South
- Improves Tree Health
Trees in warmer regions grow quickly but are also susceptible to disease and pests. Trimming removes diseased or overgrown branches, redirecting the tree’s resources to healthier parts. It’s like giving your tree a fresh start, ensuring that it can grow stronger and more resilient in the face of Southern weather challenges. - Better Curb Appeal (and a Little Southern Charm)
A well-trimmed tree can completely transform your yard, adding character and curb appeal. Down South, beautiful, well-groomed trees are part of the charm. A tidy oak or stately magnolia makes your property look polished and well-cared-for, which could even increase its value if you ever decide to sell. - Enhanced Safety
Trees with weak, dead, or drooping branches pose a risk during thunderstorms, hurricanes, or any surprise gusts that blow through Southern neighborhoods. Trimming these branches helps protect your family, home, and cars parked underneath. Just like a sturdy porch keeps you safe from rain, a well-trimmed tree minimizes risks from unexpected storms. - Sunlight and Airflow Boost
Trees with dense canopies can block out sunlight, shading not just your yard but the lower parts of the tree itself. Trimming the tree’s crown allows for more sunlight and airflow, both of which help keep the tree and surrounding plants healthy. This is especially useful for Southern trees, which can easily develop mold or mildew in humid, wet conditions. - Fruit and Flower Production
In the South, many trees—like pecan and fig trees—are popular for the fruits they produce. Pruning encourages the growth of higher-quality fruit by letting the tree focus its resources on healthy branches. Plus, trimming can improve flowering in trees like crape myrtles, making your yard look lively and inviting.
Because Southern Trees Love to Look Good
Trees in the South don’t just grow—they flourish! With warm seasons and ample rain, they can easily become the tallest, bushiest addition to your yard. But left untrimmed, they might start resembling the kind of Southern belle whose hair is all volume and no control. Trimming is like a beauty treatment for your tree: a little off the top, a bit from the sides, and suddenly, it’s the most refined thing on the block. Contact Hank’s Tree Pros in the Atlanta area for top notch tree services.
The next time you’re wondering if it’s time to trim your tree, look for the signs. If it’s creeping into power lines, blocking all the sunlight, or threatening to drop a branch on your car, then it’s past due for a trim. You’ll be rewarded with a beautiful, healthy tree that’s safe, sturdy, and perfectly suited to show off that Southern charm.
A Mother’s Guide to Kitchen Remodeling: Choosing the Right Contractor for Your Dream Kitchen

As mothers and homemakers, we often spend a great deal of time in the kitchen. It’s where we prepare meals for our families, help with homework, and sometimes even host gatherings with friends. Remodeling a kitchen can bring so much joy and functionality to your home, but it’s a big undertaking. One of the most important steps is choosing the right contractor to bring your vision to life. After going through my own kitchen remodel, I’ve put together some tips to help you navigate this process so you can make informed choices and avoid the headaches that can come with home renovation projects.
1. Define Your Goals and Budget
Before you even start looking for a contractor, it’s essential to sit down and decide what you want to achieve with your remodel. Do you want more counter space, updated appliances, or a complete layout change? By being clear on your goals, you can communicate your vision better to any potential contractors. Along with goals, set a realistic budget that includes not just the contractor’s fees but also materials, potential surprises, and contingency funds.
2. Look for Recommendations and Read Reviews
Finding a trustworthy contractor is key to a successful remodel. Start by asking friends, family, and neighbors if they’ve had any work done recently and whether they’d recommend their contractor. You’ll often get the most honest feedback from people who have had firsthand experience.
Online reviews are also valuable; websites like Houzz, Google, and the Better Business Bureau are good resources. Look for a contractor with plenty of positive reviews and a good track record. Also, keep an eye out for any complaints and how (or if) they were resolved. It’s a good sign if a contractor handles issues professionally, as remodeling projects don’t always go perfectly smoothly.
3. Evaluate Their Experience and Specializations
Not all contractors are the same. Some specialize in bathrooms, others in whole-house remodels, and some focus on kitchens. Look for someone with a proven track record in kitchen remodeling specifically, as this type of project involves both structural work and design finesse. An experienced kitchen remodeler will have the know-how to deal with plumbing, electrical, and cabinet installation requirements.
Don’t be afraid to ask for examples of past projects similar to what you want. A reputable contractor will have a portfolio of completed work to share and may even have references from previous clients. Contact these references and ask about their experiences working with the contractor.
4. Make Sure They’re Licensed and Insured
A legitimate contractor should hold all the necessary licenses and insurance. Licensing requirements vary by state, so do a quick check on what’s required where you live. If a contractor is licensed, it’s a good indication that they’re up to date with the latest building codes and standards.
Insurance is also non-negotiable. Ask to see proof of liability insurance and workers’ compensation. This protects you from liability if there are accidents or damages during the project. If a contractor balks at providing this information, consider it a red flag and move on. If looking to do a kitchen remodel in St. Louis, consider St. Louis Kitchen Remodel Co.
5. Discuss Your Timeline and Their Availability
Home remodels can disrupt your family’s routine, so it’s essential to know how long the project is expected to take. A good contractor should be able to provide a timeline for each stage of the work, from demolition to final touches. They should also be clear about their availability—some contractors may be booked months in advance, and if you’re on a tight schedule, that could be an issue.
Ask if they’ll be working on other projects at the same time. While it’s normal for contractors to have multiple jobs, you want to ensure they can dedicate enough time and attention to your kitchen remodel.
6. Get a Detailed Contract in Writing
Once you’ve found a contractor you feel comfortable with, make sure all the project details are outlined in a written contract. This should include:
- A clear scope of work (what will and won’t be done)
- Payment schedule
- Estimated start and completion dates
- Material specifications (brands, finishes, etc.)
- Warranties on materials and workmanship
A written contract protects both you and the contractor by setting clear expectations. It’s also a good idea to review this document thoroughly before signing and don’t hesitate to ask questions about anything that seems unclear.
7. Maintain Open Communication
Communication is key in any project, especially one as important as your kitchen. Make sure you have regular check-ins with the contractor to address any questions or concerns. Many issues can be resolved early if you and your contractor stay on the same page.
Some contractors provide an online portal or app where you can track the progress and communicate about project updates. This can be helpful in keeping everything organized and up to date.
Final Thoughts
Remodeling your kitchen is a significant investment, but the joy of having a beautiful and functional space is worth the effort. By carefully selecting the right contractor, you can turn your dream kitchen into a reality without the stress and worries. Remember, a remodel should improve your quality of life, so take your time, do your research, and don’t rush the process. Happy remodeling!
10 Ways a General Contractor Can Transform Your Home on a Budget
When it comes to home improvement, working with a general contractor can be a game-changer, especially if you’re looking to transform your space without breaking the bank. General contractors are experienced professionals who manage construction projects, ensuring that everything runs smoothly and stays within budget. Here are ten ways a general contractor can help you upgrade your home without overspending.
1. Planning and Budgeting
One of the first steps a general contractor will take is to help you create a realistic budget for your project. They understand how to allocate funds efficiently and can help you prioritize your needs. With their expertise, you can make informed decisions about where to spend your money for the best results.
2. Smart Design Choices
A general contractor can guide you in choosing design elements that are both stylish and cost-effective. For example, they can suggest durable materials that look great but won’t cost a fortune. By working with a contractor, you’ll benefit from their knowledge of trends and their ability to find affordable alternatives.

3. Efficient Project Management
Managing a renovation project can be overwhelming. A general contractor takes on the responsibility of coordinating all the different aspects, including scheduling subcontractors, obtaining permits, and ensuring that the work meets local codes. This means you can focus on enjoying your home without the stress of managing every detail.
4. Leveraging Relationships
General contractors often have established relationships with suppliers and subcontractors, which can lead to discounts on materials and labor. They know where to find the best deals and can pass those savings on to you. This can significantly reduce the overall cost of your project.
5. Maximizing Space
If you’re short on space, a general contractor can suggest clever ways to maximize what you have. This could involve knocking down non-load-bearing walls, creating open-concept areas, or adding built-in storage solutions. Small adjustments can make a big difference in how your home feels without requiring a massive investment.
6. Focus on Energy Efficiency
Updating your home to be more energy-efficient is a smart way to save money long-term. A general contractor can recommend upgrades like better insulation, energy-efficient windows, and smart thermostats. These improvements not only help the environment but also reduce your monthly utility bills.
7. Focusing on Curb Appeal
Enhancing your home’s exterior doesn’t have to cost a fortune. A general contractor can suggest simple updates like painting your front door, landscaping, or adding new house numbers. These changes can greatly improve your home’s curb appeal without a hefty price tag.
8. DIY Assistance
If you’re handy and want to tackle some projects yourself, a general contractor can help you identify which tasks are suitable for DIY and which require professional skills. They can provide guidance and even assist you with the more complex elements, ensuring your project stays on track while keeping costs down.

9. Smart Renovations
Instead of a complete overhaul, a general contractor can help you identify key areas to renovate that will have the most impact. Whether it’s updating your kitchen cabinets, refreshing your bathroom, or installing new flooring, these targeted improvements can transform your home without requiring a complete remodel.
10. Follow-Up and Support
After your project is complete, a general contractor provides valuable support and follow-up. They can help address any issues that arise after the work is finished and offer advice on maintenance to ensure your newly transformed home stays in great shape.
Conclusion
Transforming your home doesn’t have to be a costly endeavor. With the help of a general contractor, you can make smart choices that enhance your living space while staying within your budget. From planning and design to efficient project management and support, a contractor can turn your vision into reality, ensuring that your home reflects your style and meets your needs. So, if you’re considering a home renovation, hiring a general contractor might just be the best decision you make!